Friday, March 17, 2017
Wednesday, July 10, 2013
Want to build a gag manniquin?
Only when I build something that might interest some people do I post it.
Well, one day I saw these almost life-size gag dolls sitting in a furniture store and they looked pretty stiff like just having broomsticks for limbs. But I liked the idea of it and was told that I could have one for 250 bucks. I thought that I could make one myself and it would be a lot of fun doing so. Using material you can get anywhere at hardware places, goodwill stores and keeping your eyes open at swap-meets, garage sales etc would keep the cost down, and besides the hunting for stuff you can use makes it fun.


Oh, by the way, Luke's Mexican friends call him Lukas, Lukas el Mechudo.


Tuesday, May 15, 2012
Second Bathroom Remake


Friday, October 8, 2010
Bathroom Remodel

When you go shopping for granite, you will quickly find out that these granite slab yards are only interested in selling you the whole slab! For a bathroom that would be way too much granite. So the secret is to find yards with remnants (yards with in-house fabricators have remnants), or find a fabricator that has remnants.

I have decided to start out slowly by re-doing the wall opposite to the vanities first. I already have bought the vanity cabinets and ordered some extra side panels which will be installed at the bottom for decoration. No need to remove the tile (I tried, it 's too much work and it tears the wall's gypsum board.), so I'm going to glue the paneling with construction glue to the tile. In the meantime I already have installed the panels on a plywood backing, so it is ready to be installed.


I forgot to photograph the making of this panel, but all I did was glue the three decorative panels on a plywood backing, nailed the trim on, and painted it.


OK, the section to be removed is out exposing the stud. I'm going to use sections of 2x4's to frame the opening, so mark a cut line 1 1/2" below and above the opening at the stud.


What you see here is the old hole where the old medicine cabinet was located and it needs to be moved to the right
You can also see that the big wall mirror has been removed (disposed off at the Goodwill Store).
Two separate framed mirrors will take it's place with lights above them.

.Using the same procedure as explained before you're looking at the new compartment hole for the new medicine cabinet with the old one still not closed up.

It is all closed up now and plastered. When you plaster a wall you ruin the orange peel texture which is easily fixed with a spray can of 'Orange Peel' available in any hardware store.

Orange Peel texture is on and the wall can be painted now.

The new mirrors are hanging with the lights installed above them. All that needs to be done is run the electric wiring (hire an electrician if you are unfamiliar with electricity!) to the new lights from the old flood light (so dated!) which will be removed. Since my house has a flat roof with absolutely no access to the ceiling crawl space area (there is none), I had to cut a hole in the ceiling to access the electrical wiring. If cutting a big hole in the ceiling gives you goose bumps, be unafraid my friend, all can be fixed!

Here are the two ceiling pieces removed to gain access to the new lights. Make sure that the access hole is rectangular so that you can frame the hole with wood leftovers.

I installed a new panel for some reason that eludes me right now (you can use the removed one if possible) and had to popcorn texture it. You can buy this popcorn texture in a spray bottle (expensive) or in a container (cheap). I went the cheapo route of course and had to use my fingers like a mad eccentric artist trying to match the texture as much as I could.

There we go. It's done. I don't know why the picture shows up as pink but that is were the repair is.

If you ever have to paint the kick board next to the carpeting, use masking tape like shown. Push it down with your fingers and a spatula as deep as possible.

After having done the installation of mirrors, medicine cabinets etc. it's time to start ripping and tearing. My wife has suggested to only remove one sink first so that we at least have the use of the other sink to wash up. Good idea.

Used a circle saw with concrete cutting blade to cut the counter top in half. It went through it like it was butter

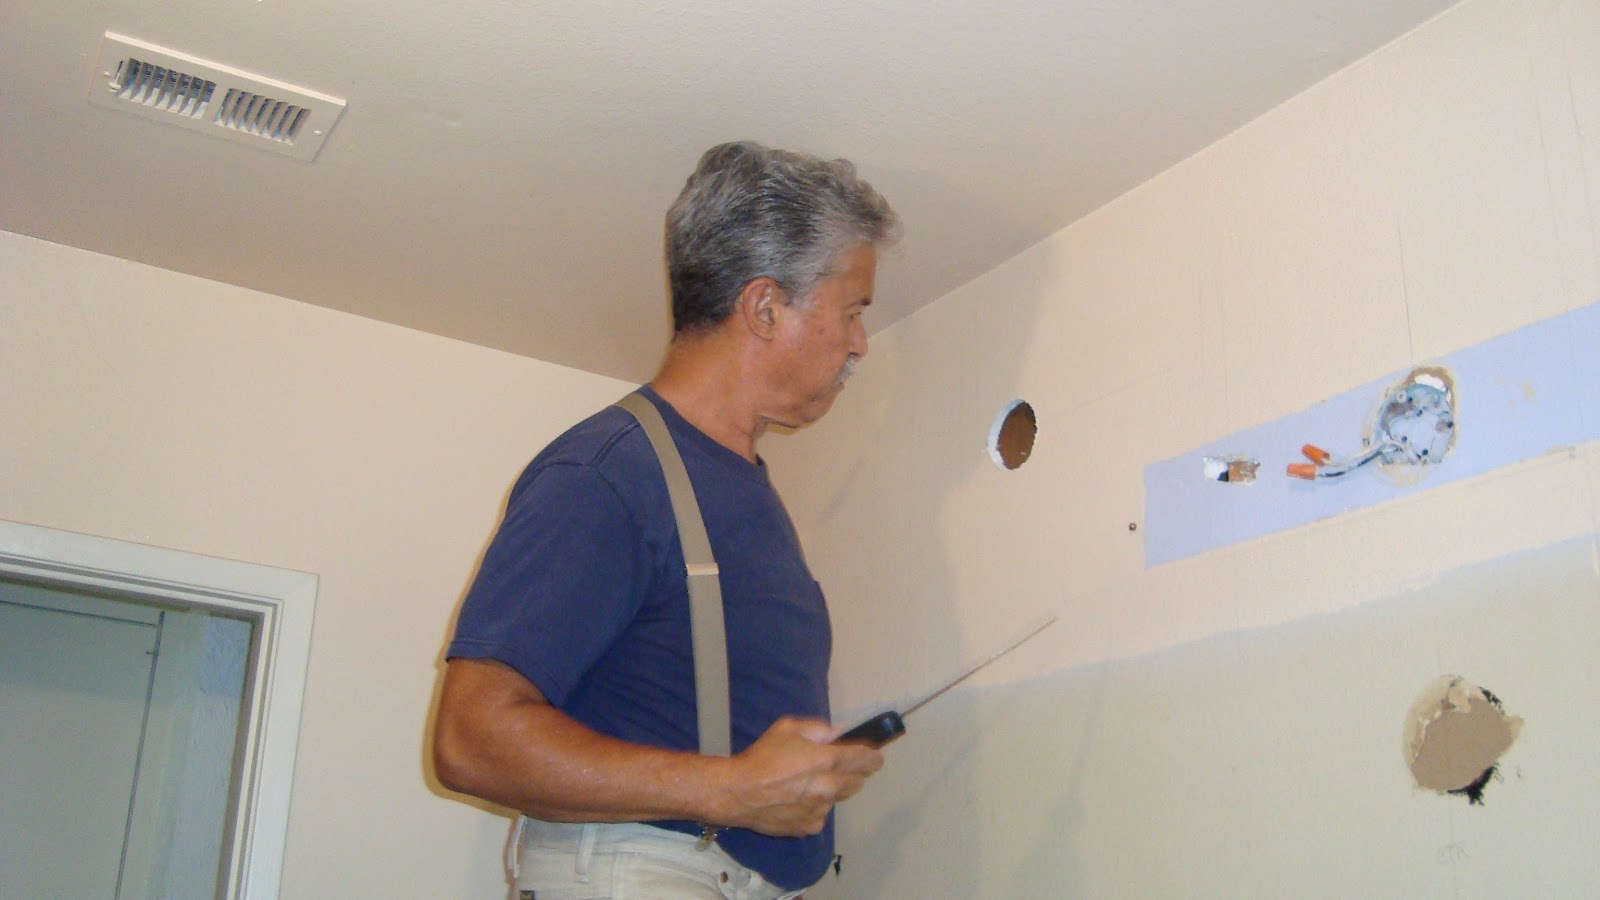
I can now finally run the electric wiring for the two new outlets. What you do is locate and mark where the studs are and remove a piece of the gypsum as shown, making the hole big enough to run the wiring passed the studs. I used the spring wire from an old car window sunshade, you know the ones that are very tricky to fold up when you first use them, to run the wire. See the white wire in the picture.

Here is a closeup of the wire, which is the flat, indoor, three conductor (black, white, bare) copper type. Do not notch the studs, that will weaken the studs which is not good when they are weight bearing studs. Maybe I'm nitpicking, but there is plenty of room to plug the holes. Use 1/2" plastic cable staples to secure the wire.

Here you see one of the new outlets. Make sure that the proper breaker is in off by plugging a lamp into the outlet you plan to tie into and notice when the light goes off when you flip the outlet breakers. Make sure both outlets (top, bottom) are not powered. The outlets in your bathroom have to be GFIC protected due to the close proximity of water. Now is the time, with the breaker off, to find the first ac outlet in the string that is dead, which is usually the one located closer to the breaker box. In my case it was located in the garage. That is were I installed the GFIC outlet. Now every outlet in the string, including the new ones, are now protected.
The white wire hooks up to the wide prongs, black to the narrow prongs and the bare wire to the green screw. Remember if you have no power afterward, check your GFIC to see if it tripped

But there is always a first time. Just do it and use common sense.
I have decided to install the vanities 1/2" up off the floor for two reasons:
Your should know where the highest point of the floor is (remember I haven't remove the other sink yet), because most floors are uneven.

The wall also was slightly slanted and the studs to which you attach the cabinets were lined up at the most impossible areas of the vanities. So again killing two birds with one stone so to speak, I used a plank, attached to the studs, to which I will attach the vanities. Make sure by using levels that the plank is perfectly level. Everything has to be meticulously level in three axises. Do this by attaching the back first to the (level) plank, then shim the bottom so the remaining axises (back to front and sideways) are level. Use c-clamps to help you install the next cabinet.


Now I'm finally done! It was fun and a learning experience. A lot of time you have to stop and think things out. Search the internet for answers, use Yankee ingenuity and plain common sense.
Ordered the granite top and below is a picture how the granite installers make a template first so the top will fit.

They use thin slats of wood that they glue together with a glue gun.

Well. here is the finished bathroom. The granite installers installed the top counter yesterday and also drilled the holes for the faucets, and today I installed the faucets, sinks and all the plumbing that goes with it. The counter-top edge is beveled and the back-splashes have a half bull-nose trim. We saved a lot by doing it our self.

We love our new bathroom! I hope this project inspires you to give it a try yourself! Remember make the colors you choose coordinate, also contrasting shades are important. Don't pick wild colors, you tire of them real quick.When you adhere to those rules everything will fall into place...

Till my next project. Let me know what you think.
Take care.
Subscribe to:
Posts (Atom)
