

Here the back-wall had been fabricated first and then erected in place, because of the proximity of the wall. I decided to use cement based panels for siding to make make the shed more resistant to the elements. That's me with my son Tason who helped me raise the back and side walls which were surprisingly heavy!


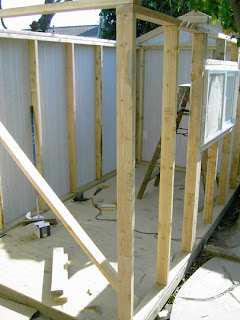
Here I have framed the outside wall in place since there was no access limiting yard wall in the way. The window we picked up used at a place were they sell surplus building material.


The 'Hardi Panel' siding is on and it starts looking like a shed already!

 To my great surprise I discovered that I did not picture document the construction phase of the roof! So here is the next best thing... Yep, pictures of the roof so you can see how it is constructed.
  The plan called out for a 2x8 Ridge Beam, but I used a 2x4 as you can see. The rafters are nailed to the Ridge Beam with four nails, two on each side. So as you can see I did not follow the plans recommendations of using special hangers and hurricane clips etc... For my needs and where I live this is strong enough
This is one of the 2x4 pieces between the rafters called Soffit Caps. It closes the gap between the roofing and the top of the side walls.
Yours truly just installed the work table by the window, supported by iron tubing at the bottom.


My mother finally came out of the house to inspect and see if all that hammering noise she listened to was worth it.

Well, that's it folks. I hope you enjoyed watching the progress on how the shed was build as much as I enjoyed building it!


